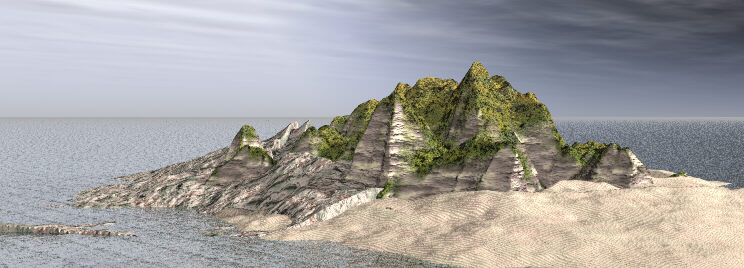
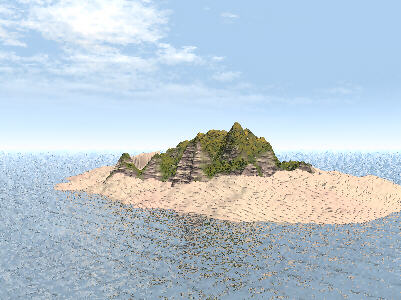
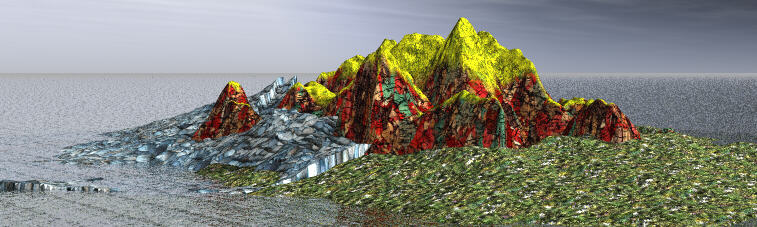
This image (not the tutorial :-)) were created in only 10 minutes. 4 different materials were used on only one terrain which has been copy/pasted twice. In this example, I use VUE's procedural material, but you also can use a bitmap for each part of the terrain. In this case, you could separate the different parts of our bitmap in a paint program and create a new bitmap from each material. Then apply it like shown in this tutorial (see a sample at the end of this page).
Start to open Vue, choose an atmosphere & dark Water and create a terrain.
(You may find out later, when you get used to this soft, that you also can create a terrain in your paint program, divide it into the different parts corresponding to your bitmap and then import it in VUE)
Double-click the terrain to open the TERRAIN EDITOR. Then bring up the terrain size to 512. Click OK
Now copy/past your terrain.

Rename Terrain 1 to SAND and Terrain 2 to MOUNTAIN.
Select and double-click your terrain called SAND to open the TERRAIN EDITOR. Choose PAINT and DIG, take off completely the center of your terrain. Then clip your terrain as shown to 1.00. Click OK.
When you are back in Vue, you can see clearly the clipped part of your terrain.
Resize your SAND and flatten it. If necessary place it a way that it comes out of the water, as the following images shows. Map it with a sand material.
Now select your terrain called Mountain and double-click on it to open the TERRAIN EDITOR again.
For this example, do the following in this order :
1. click at MOUNDS 2. click at ERODED
3. Click at PAINT and DIG and take off the outside part of your terrain, make it a bit rounded.
At least, clip your terrain as the image shows. Click OK.
Resize your terrain to make it fit in the empty part of the SAND terrain, flatten it if it is too high and map it with a mixed ROCK/GRASS material.
At this moment, I made a quick render of my picture and found that only the left side of the SAND terrain needed to be changed into a stone material.
To do this, select the SAND terrain and copy/past it. Rename the copy to STONE. Then seect the original SAND terrain, double-click on it to open the TERRAIN EDITOR. In clicking on PAINT and DIG, take off the part of the terrain you want to become stony later. Don't forget to clip the terrain at 1.00. Then click OK
Now select the terrain you named STONE, double-click on it. The terrain editor opens. Take off the opposite part of the terrain. This means the part of the terrain you want to stay sand and not to become stone. Clip your terrain as before and click OK.
Back in VUE screen you may need to resize your Stone terrain and mabe to place it in a better way. Map it with a ROCK material. To see better the way your terrain pieces are disposed on your screen, give to each wireframe part a different color.
Make a quick render to see what it looks like. For my final image you see above, I changed at least the atmosphere, added a shadowless directional light and flattened the sand terrain to make it look more like a beach. iI also scaled the sand material to 0.1.
Up to you now to ry to apply bitmaps insteed of procedural material. The system stays the same. For farther creations, try to soften the edges of your terrain, it will look better.
Just for fun, it's not nice but shows what it should show : The same scene where I used 4 different bitmaps and 1 mixed material (procedural) from Vue. In such a case, don't forget to check OBJECT SPACE in the material editor for each bitmap you use.
Please mail critics and comments to me.